The idea for the project began when my friend may have had
an extra NES (turns out he couldn’t find his original) for me to buy/acquire. I’ve
always wanted to mod a Nintendo after seeing pictures and videos online.
I just recently bought four “broken” NES consoles. I put
broken in quotations because the only thing wrong with them, that I could see,
was the connector and they were dirty as all hell. After cleaning connectors
and polishing up the system I got three of them to work. I’m awaiting new
connectors for the forth one.
I took the best of the “broken”, now fixed, systems and set
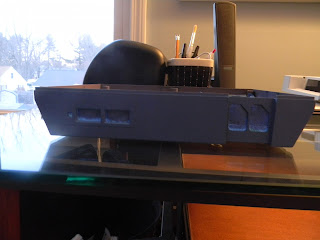
forth converting it to a megaman themed NES for my project. Blue bottom half of
the case, white top and a blue stencil helmet for the top. Similar to this:
I’m not going to paint the eyes and mouth. It’ll basically
be an empty helmet.
One thing you should
know, during the beginning of the project I was unemployed and had plenty of
free time to learn and tinker.
Now began the search for the right paint. I read online that
Krylon Fusion is great for plastic, but I couldn’t find it at local stores and
ordering online was way too pricey. I set aside a budget of $100 for the
project. Shipping and pricing was something like $8 for one can. Instead I
bought this (except for the small model spray paint, my buddy gave those):
The Krylon Maxx did not go on very well. Very drippy and
uneven. See here:
The last shot doesn’t look too bad. But the first two were
rough and I had to sand out the bumpy, drips. Also note: I was painting in a 40oF
garage. Probably more like mid 30o’s. Don’t do that. Once the paint
hits a cold surface it wrinkles and ruins the coat. Stupid me for starting the
project in winter.
Despite the low temperature the blue paint (Rust-O-Leum)
came out pretty well:
I used painter’s tape to cover up
the serial number and other stickers on the bottom of the case. Also I peeled
off the first layer of rubber feet and set them aside. Then I taped up the
feet. I removed the expansion cover and painted it white:
It needs another coat.
Case assembled it doesn’t looks
too bad. Everything still needs gloss and the top case needs another coat. I
think I’ll try out the model paint I got from my friend.
Now on to the mods. I wanted to replace the power light LED
with a blue one:
Looks pretty nice. Hopefully it
will do because it’s a 3mm 20mA LED. The standard red one is 5mm. So far it’s
working great and hasn’t been fried.
Then the last project is some interior lighting for the
consoles. I ordered some 5mm white LEDs and respective resistors, based on this
calculation:
Very useful.
I started the project by taking an old cell phone charger
cord, because I needed wires. Cutting and soldering on LEDs. They burnt out
because I didn’t have resistors, stupid me again. I’m learning. Here are the wires.
I plan on having two LEDs wired in parallel with resistors on the positive
wire. It should work.
That’s where I’m at so far. I’ll update periodically. As of
right now I’m waiting for the weather to warm up and parts to arrive.
Month and a half later it's pretty much done. Waiting for some paint to dry. Had a little connector hiccup but replaced with a clean one and now games are working and looking great.


Month and a half later it's pretty much done. Waiting for some paint to dry. Had a little connector hiccup but replaced with a clean one and now games are working and looking great.


A collage of final result pictures. The underside with tape pulled off revealing cool stickers and serial number. I like the red repair shop sticker, haven't seen that on other systems before.
The mega man helmet came out a little blurry but I like the effect. Haven't sprayed gloss and I probably won't. Looks good without.
Using the cell phone cord from above with two 5mm white led's wired in parallel with resistors I added some interior lighting. They're not bright enough to shine through the vents but my idea was to play with the door open.
The finishing touch was the nice, metal Nintendo decal I bought from somebody in Denmark, random I know. Not too bad for a first mod.


